Cake pops are a quickly growing trend in the UK
Being my first attempt, I have no shame in telling you that I did make some mistakes along the way, but thankfully nothing that affected the taste or appearance and don’t worry I’ll be sharing them with you, so you don’t make the same faux pas.
Here are mine, follow my quick step by step cake pop tutorial to produce your own.
Equipment
Sponge
Coloured chocolate drops
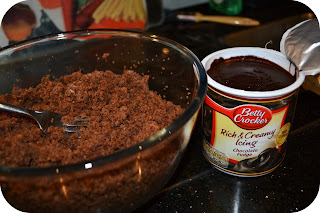
Pre-made icing - I used Betty Crocket Rich & Creamy Chocolate fudge icing
Lollipop sticks
Cellophane covers
Decorations – i.e. sprinkles,etc
 |
| Nice and simple bake a sponge, mine was a really simple chocolate sponge. |
 |
| Don’t let the sponge cool too much as you have to break it down into crumbs and mix in the pre-made icing. |
 |
| Once you’ve found the right consistency, start rolling the sponge into balls |
 |
| Now it starts to get messy! Melt down the chocolate. This is a lot easier than it use to be as the melting can be achieved in the microwave. |
Tip: I divide all of my coloured chocolate into separate bowls and melted as needed so it doesn’t set again.
 |
| Setting the lollipop stick in the chocolate ball. Dip the stick into the melted chocolate and pushed into the ball. When the chocolate sets it will set into place. |

My Biggest Faux pas was making my balls too big!! My eyes were obviously bigger than what the sticks could handle, so please don’t make the same mistake as me or you will also have trouble getting the ball to stay on the stick!!
Pop your cakes pops into the fridge for an hour to set.
Now for the Fun.. Decorating the Cake pops.
This part is entirely up to you, go as crazy or not as you like here are mine
This part is entirely up to you, go as crazy or not as you like here are mine
 |
| Oh! it looks like someone is enjoying their food. |
Sponsored by:


No comments:
Post a Comment