Home AboutUs
Showing posts with label sewing. Show all posts

Sunday, 22 January 2012

Oilcloth Lunch Bag Tutorial

We predict 2012 is the year of oilcloth, forget the plastic tablecloths we remember as children and acquaint yourself with the new fashionable oilcloth with gorgeous prints.
My love of oilcloth started last summer at the SW Craft Club pop up summer events. I brought 20 metres of oilcloth to cover each table for the event and besides being a protective cover it also needed to look pretty.  


Fast forward to the winter and I have 20 meters of oilcloth gathering dust in my home, I’m all about recycling and upcycling, so I researched the fabric further and what it’s capable of and other than being referred to by lots of different names, I also learn it can be waterproof, it’s wipeable,  it’s durable and I think fun! This Christmas my nearest and dearest received oilcloth lunch bags and they look amazing! Even one of a male friend has asked me to make a manly version for him (see below)

Still not sure? Checked out the latest ranges from Cath Kidson, Boden and Lisa Stickly and you’ll find very pretty bags, in all shapes and sizes, mobile phone holders and aprons etc.
Like I said 2012 will be the year of the oilcloth and here’s how you can get involved. I have to be honest, I’d like to pay homage to Martha Stewart, from where I originally found this no brainer of an idea, for the lunch bag but her tutorial isn’t as detailed as I need it, see below:

Cut main piece 29 1/2 by 8 inches and two side panels, each 12 1/4 by 5 inches.
1. Fold long panel, inside out, into U shape with 5-inch bottom.
2. Make 1/4-inch cut at bottom corners of side and middle pieces so bag folds smoothly. Sew-in side panels, leaving 1/4-inch seam allowance.
3. Turn right side out and top-stitch all around, 1/8 inch from edge.
I’m not sure if you are like me, but I need images or more detail, either way, Martha you were a bit sparse on this occasion.
Below are my additional tips and images to help you to help you to make your own oilcloth bag:


Finished. One waterproof manly oilcloth lunch bag
Here's two I made earlier


...and we found more great examples on Pinterest


Pin It

Tuesday, 29 November 2011

Book Review: Patch! By Cath Kidston


Words and Photos by Fran Swaine ( Skulls and Ponies Blog)
Patch! Is the fourth book in Cath Kidston’s series of sewing books taking an innovative approach to the traditional art of patchwork. It aims to combine established techniques with a more contemporary approach to the craft.
My first reaction to the release of this book was one of excitement because Sew! (one of Cath Kidston’s previous books) inspired me to get me back into sewing after several years hiatus. I should also admit that for some reason I thought this was a book on quilting, and when I realised it was patchwork I felt a little disappointed. However, this disappointment soon dissipated when I flicked through the pages and discovered some fantastic projects that got me frantically bookmarking all of the things I wanted to make!
Like all of Cath Kidston’s books, the first section is dedicated to the sewing basics informing you what you will need and detailing basic sewing techniques. This format is great for beginners; it means they can easily pick this book up knowing nothing and learn as they go. It also works for advanced crafters like me, acting as a prompt section when you can’t remember all the fandangled names for sewing terms!
The next section of the book is split into explaining the different types of patchwork such as traditional techniques, hand applique and embroidery and embellishment. These sections are really useful as they don’t assume you have any prior knowledge;  you might be great at patchwork but never done any embroidery so need the different types of stitches explained. 


The rest of the book is made up of 30 projects. The first few projects are very traditional such as patchwork bags which to be honest I found rather boring. Where the book gets exciting is where Kidston starts applying these traditional techniques to contemporary ideas such as a cute little patchwork dog and patchwork ball. 
The Dresden Plate Tote Bag (featured on the front cover) even though traditional I really loved and the book included everything you need to make it.

My favourite thing about this book was being introduced to the Suffolk puff! An incredibly easy to make embellishment which is extremely eye catching, especially in vast quantities like the Suffolk Puff cushion.

I chose to make the Suffolk puff necklace and embellished with a few buttons. 
I give this book an impressive 3/5.

Pin It

Sunday, 9 October 2011

Book Review: Everything Alice


Take a moment and escape from your everyday life into a craft fantasy world. Inspired by the enchanting world of Alice in Wonderland, two lovely ladies have come together to create this craft book Everything Alice, much like the story, this book is magical. It was enlightening to read the journey the book’s creators took to put the book together.  Obviously a labour of love, the book taps into many different crafts to create 50 original projects, from the march hare’s house tea-cosy and Cheshire cat hand warmer to the lavender dormice and one of my favourites the Humpty Dumpty Doorstop, even the title for each project is inspiring.

It’s clear this book has not been hastily created, throughout the book the images and illustrations are beautiful, from the Invitation Cushion and Mad Hatter Hats to the Shadow Puppet Show . Each time you look at the book you will notice anther small detail with in the projects. 
Shadow Puppet Show. Credit: Tiffany Mumford
We Made this.....

SW Craft Club Fabric Covered Tea Pot

Following the success of the book, more products have been launched to compliment it, including the Everything Alice Note Cards – Eat Me, Queen of Hearts Cake Stand and note books.

This book is a great gift, Everything Alice we salute you and give you 5/5

Don’t just take our word for it, click to read more book reviews on Amazon 


Pin It

Thursday, 29 September 2011

Make your Own Knickers

Hello SW Craft Clubbers, my name is Natasha and I will be your guest blogger for today. I would just like to say I am very happy to be over here at SW Craft Club as a life time South Londoner and a crafter to boot.
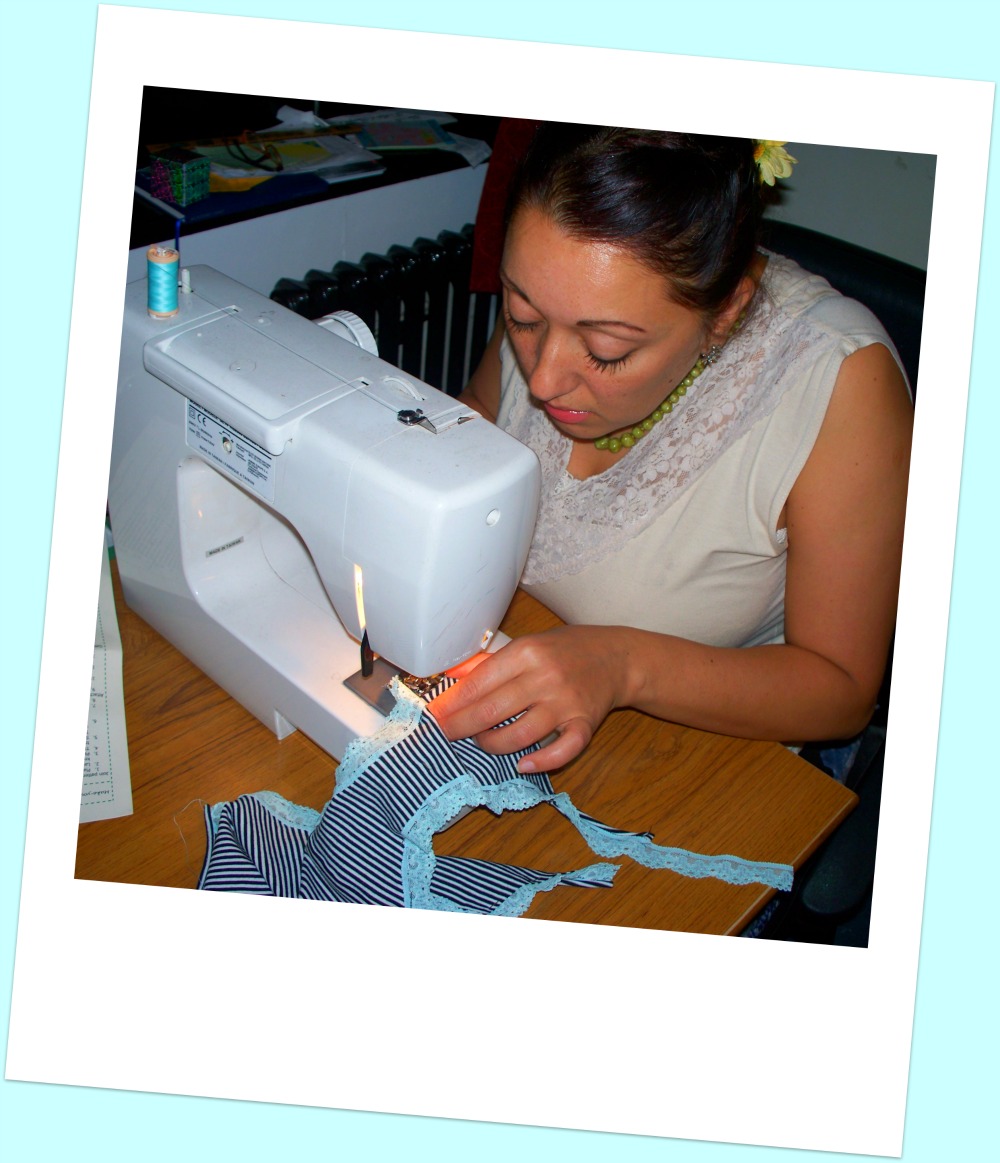
Today I will be reviewing Emeliana Underwear’s Make Your Own Knickers Kit where you get to make your very own pair of upcycled knickers.

The kit basically gives you everything you need including material, thread, lace and easy to follow instructions. All you need is a sewing machine, a pair of scissors and some pins.
The info sheet advises that you take a paper copy of the cut out knickers pieces so that you can make more knickers at a later date.

Firstly you will need to pin the three pieces of fabric together as per the instructions and sew together.

Despite being an experienced sewer I don’t have much experience with jersey or stretch material so as advised in the info sheet it would be wise to practise stitching on some scrap material first. The trick with stretch material I find is patience and take your time.

Then you pin your lace to the sides and waist and sew together.


Then finish of by sewing the sides together, attaching the bow (not skewiff like mine) and trim all the excess thread and voila a pair of upcycled knickers.


As an experience sewer I found this project relatively easy and a lot of fun and it only took me approximately 2 hours to complete this project. However I do believe this kit would make a great starter project for an inexperienced sewer as the instructions are easy to follow and there is a website should you need any helpful hints or need to ask any questions and as I already said it gives you all the materials you need to make the knickers.

The info sheet is full of helpful hints and tips and the whole kit is very user friendly. This would make a great gift for either an experienced or inexperienced sewer and not only that if you take the advice and copy out the pattern you can make lots more pair of knickers.

These kits come in three different styles hipster brief, bikini and shorts, sizes range from 8-18 and they only costs £12 plus £1.95 p&p for UK orders and £2.95 p&p for overseas orders and are available to order on Etsy.

For more information you can visit Emiliana Underwear


Pin It

Wednesday, 17 August 2011

Blog Give Away No. 4!

Artyard handmade is a welcomed addition on the craft block!
To celebrate the launch of Artyard handmade we have a £50 Artyard handmade gift voucher for you to win. All you have to do is answer this simple question:

Where in south London is Artyard handmade based?

Send your answer to us via twitter, facebook or post the answer onto the blog, but for blog entries make sure you leave contact details.
Deadline: Wednesday 24th August 12pm

Deadline Date: 12pm Wednesday 24th August
Website: http://bit.ly/mRwvEk
twitter @artyardhandmade

Tuesday, 9 August 2011

Summer pop-up in Clapham

Following the success of our crafty pop-up in Tooting, Clapham was our last pop-up for the summer. The Make and take crafts concept is new to the UK and we’re happy to champion it, buying at craft markets is one thing, but taking part in lots of different craft activities (ideally for free) is much more fun.
The events are opportunities for companies to showcase themselves and the different types of craft courses they offer and we think it worked it out. Thank you to the companies who took part, we hoped everyone enjoyed themselves at both events.
Below are the pictures from our lovely (sunny, then rainy and then sunny) Clapham event and as they say pictures speak louder than words… Enjoy!


Related Posts Plugin for WordPress, Blogger...
Powered by Blogger.